Care
Cleaning
General advice
With daily use (3-4 espresso per day) we recommend you remove and clean the piston once every month and the shower screen once every month. Depending on the hardness of your water, we recommend descaling once every 2-3 months. Under normal wear, the piston seals will last for 5 years or longer. When they eventually need replacing, you can find all compatible seals, spare parts, and accessories in our shop.
You can browse all Strietman manuals below. For more information, please consult our Brew guide and FAQs. You can also reach out to customercare@strietman.net at any time.
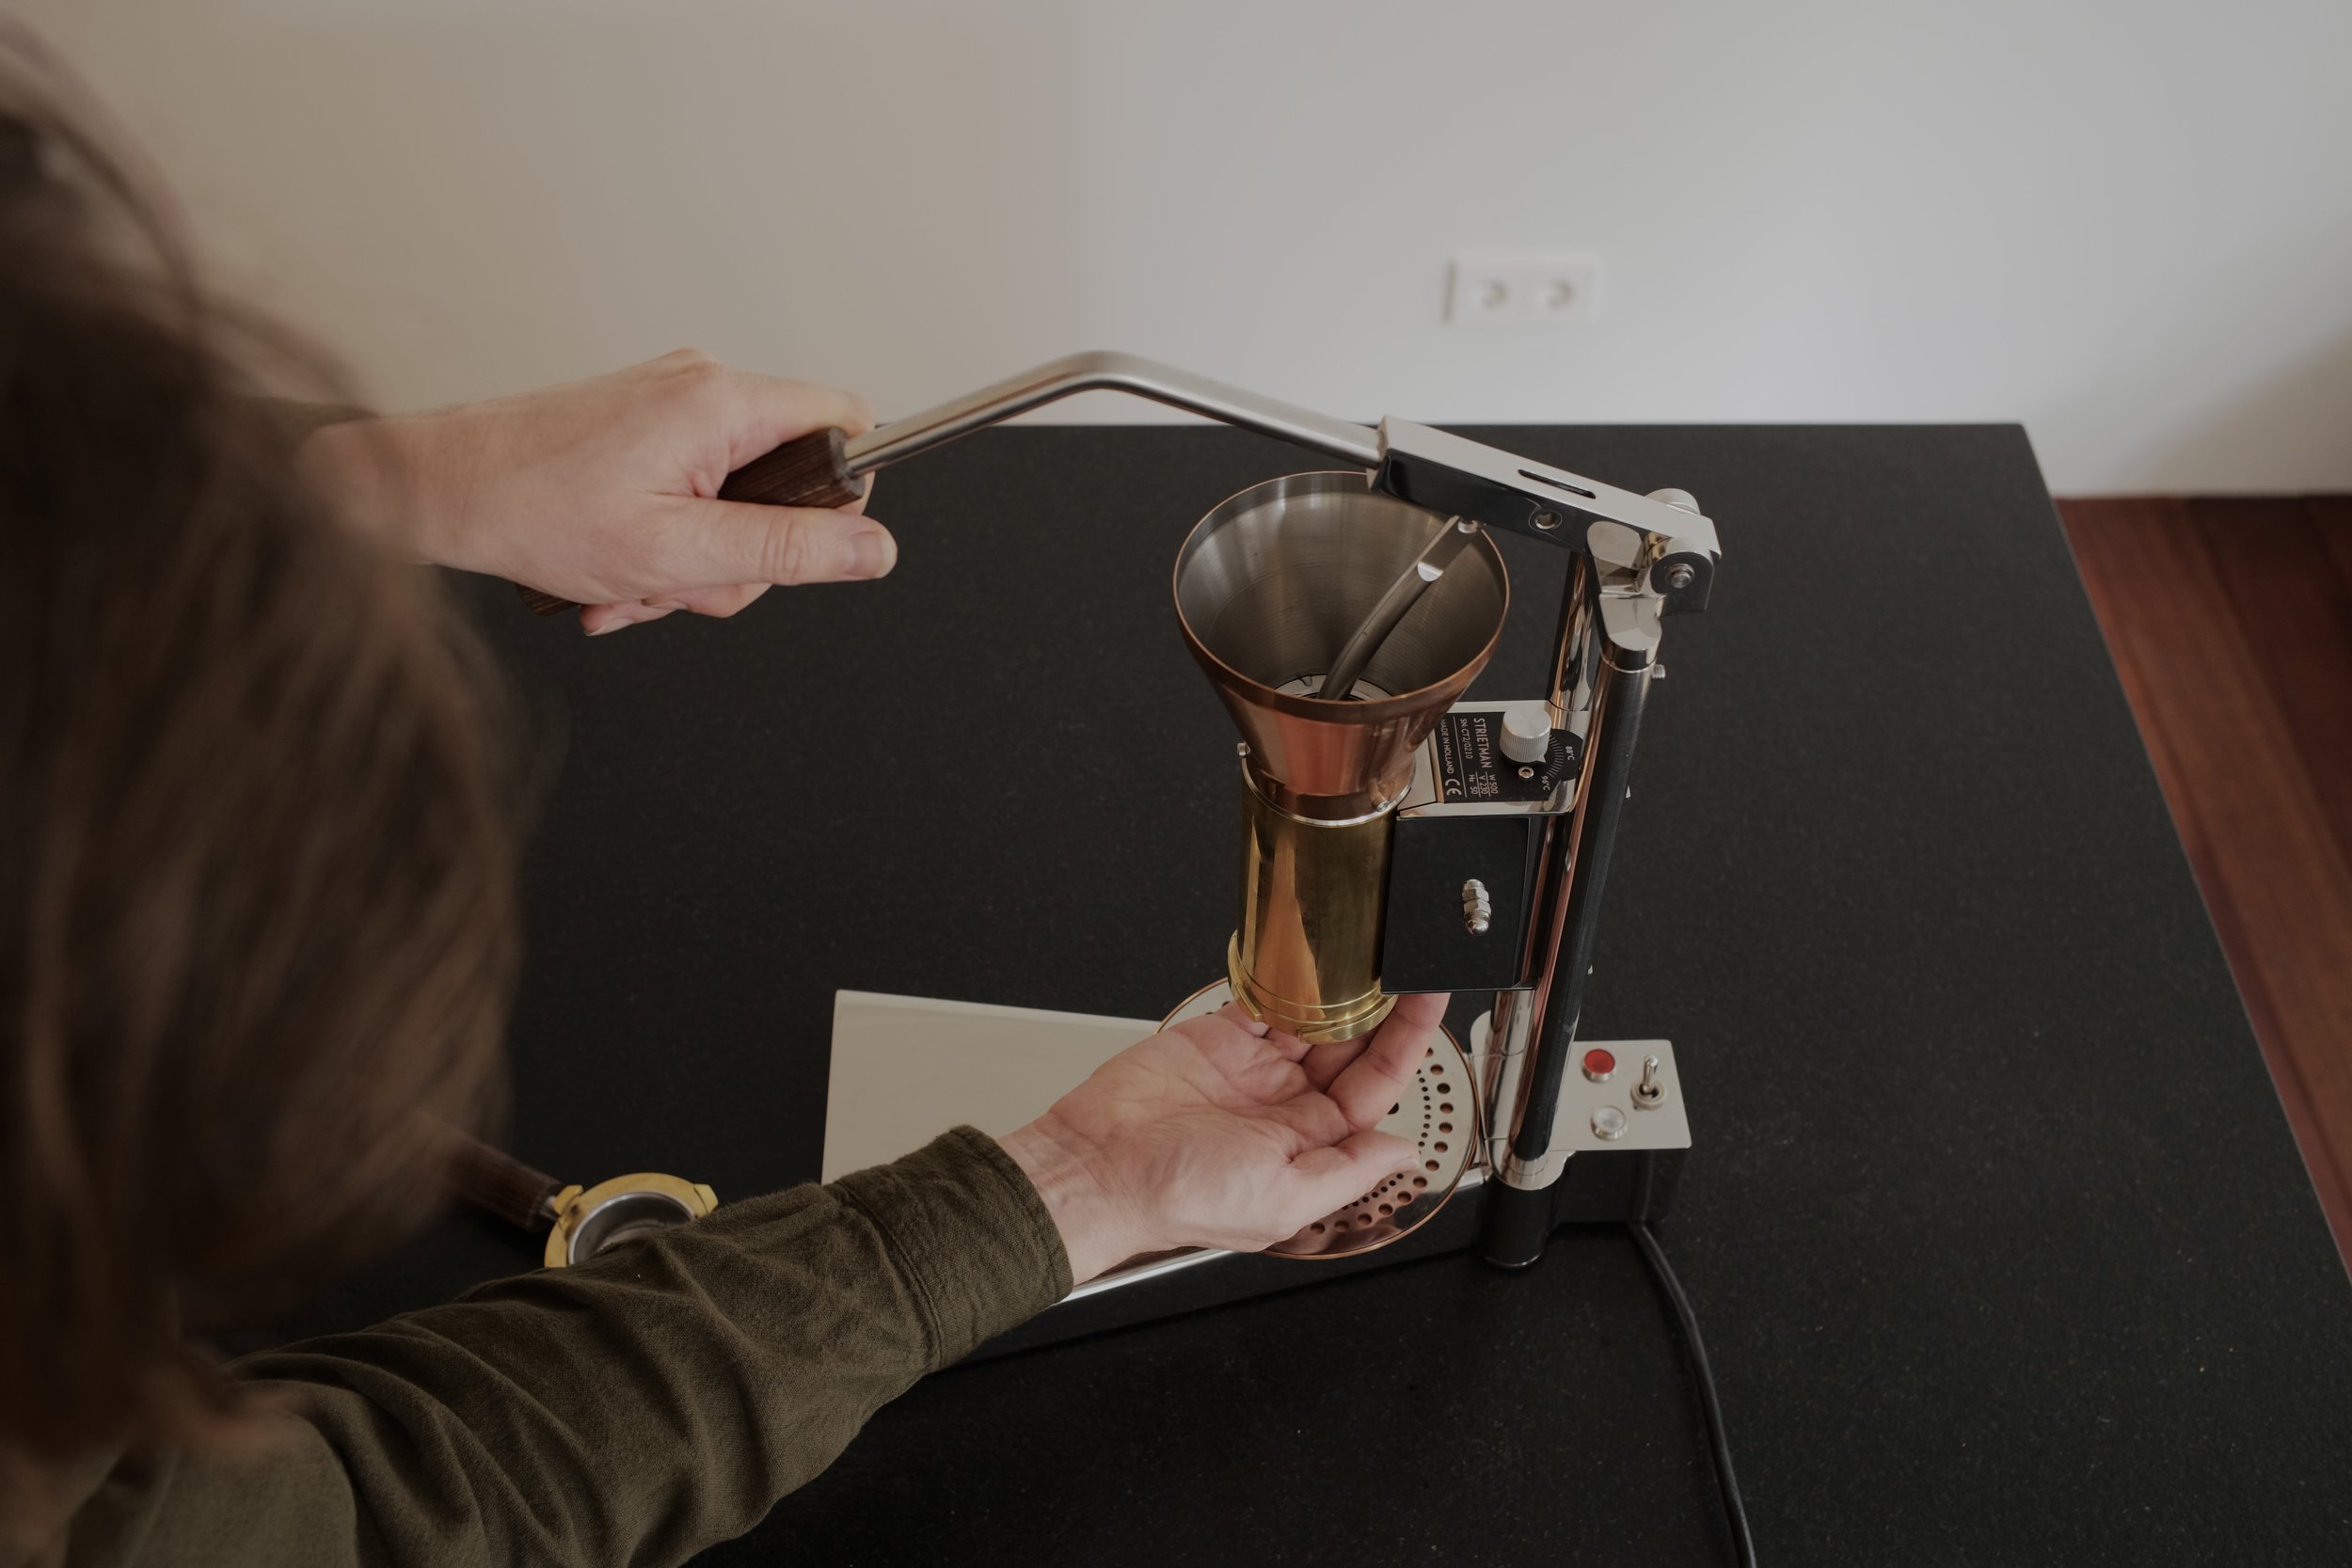
How to remove and clean the piston
Remove the filterholder and make sure the CT2’s power switch is turned off.

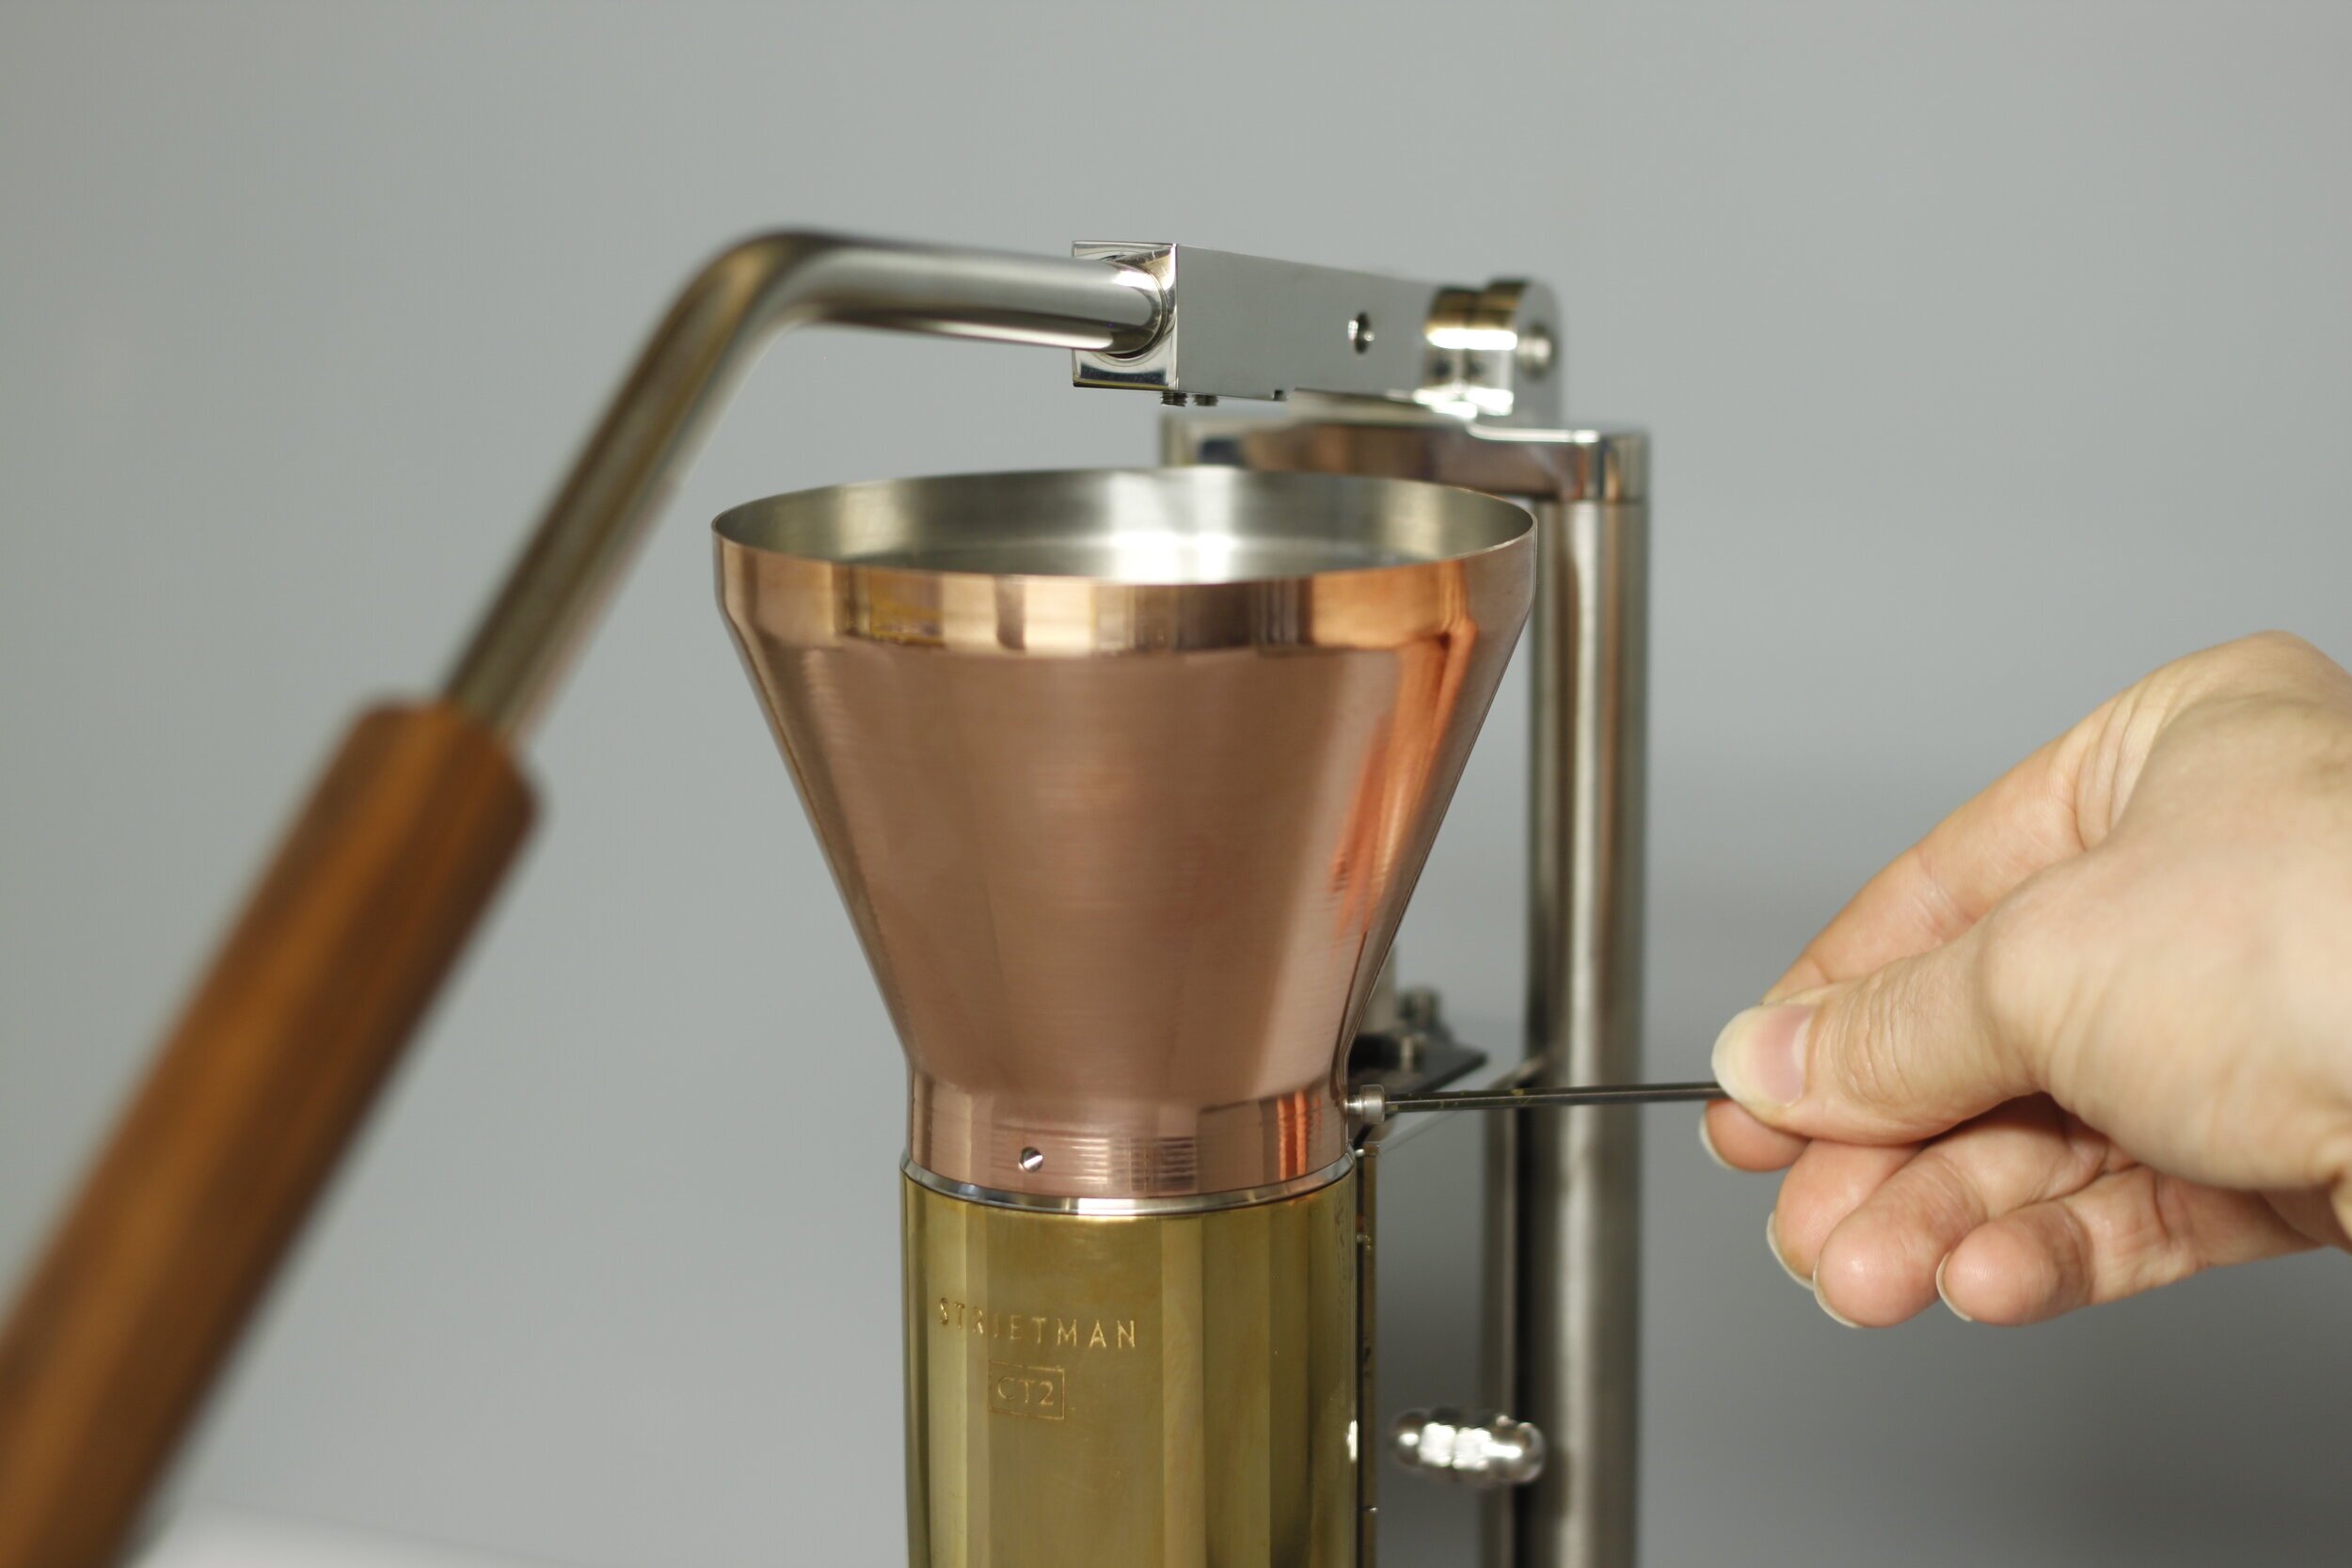
1. Unfasten the quick connect wheel at the pivot point and remove it.

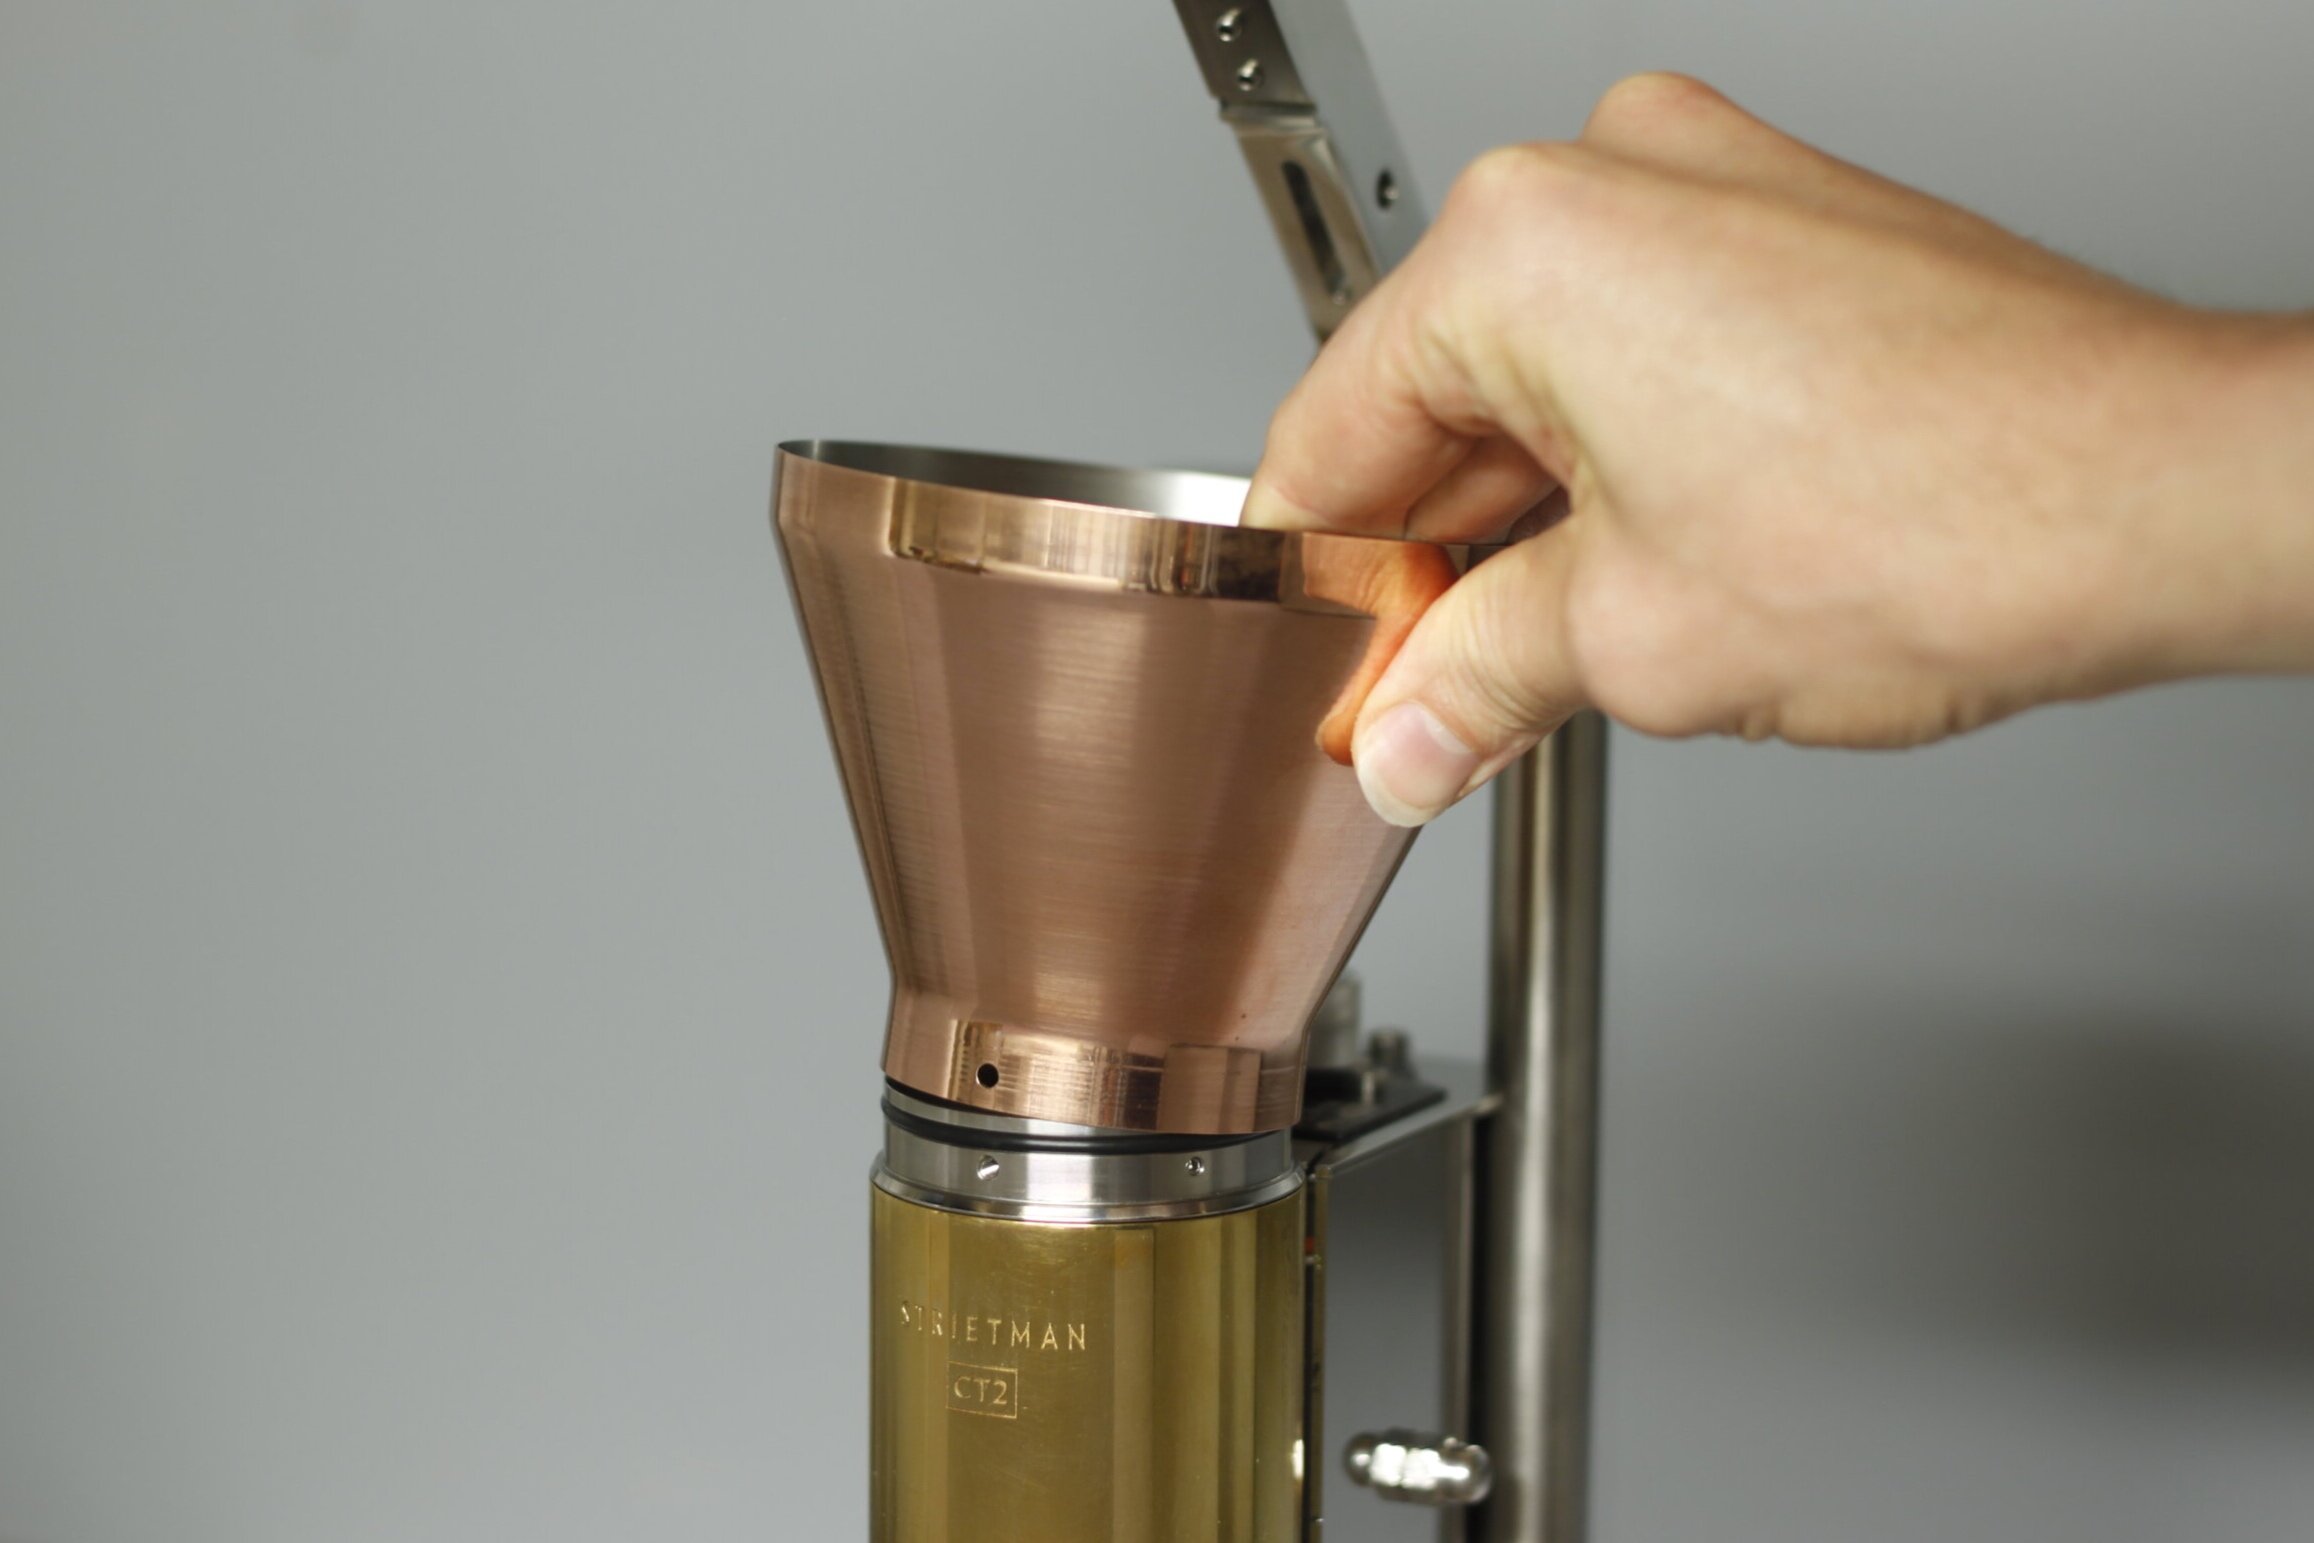
2. You can now lift the piston out of the boiler.
If there is a lot of limescale buildup, you may need to descale your machine before the piston can be removed. The piston can also be removed through the bottom of the group.

3. Clean the piston with hot water and soap and inspect the seals. Lubricate them with a small amount of silicone grease before putting the piston back in the machine.
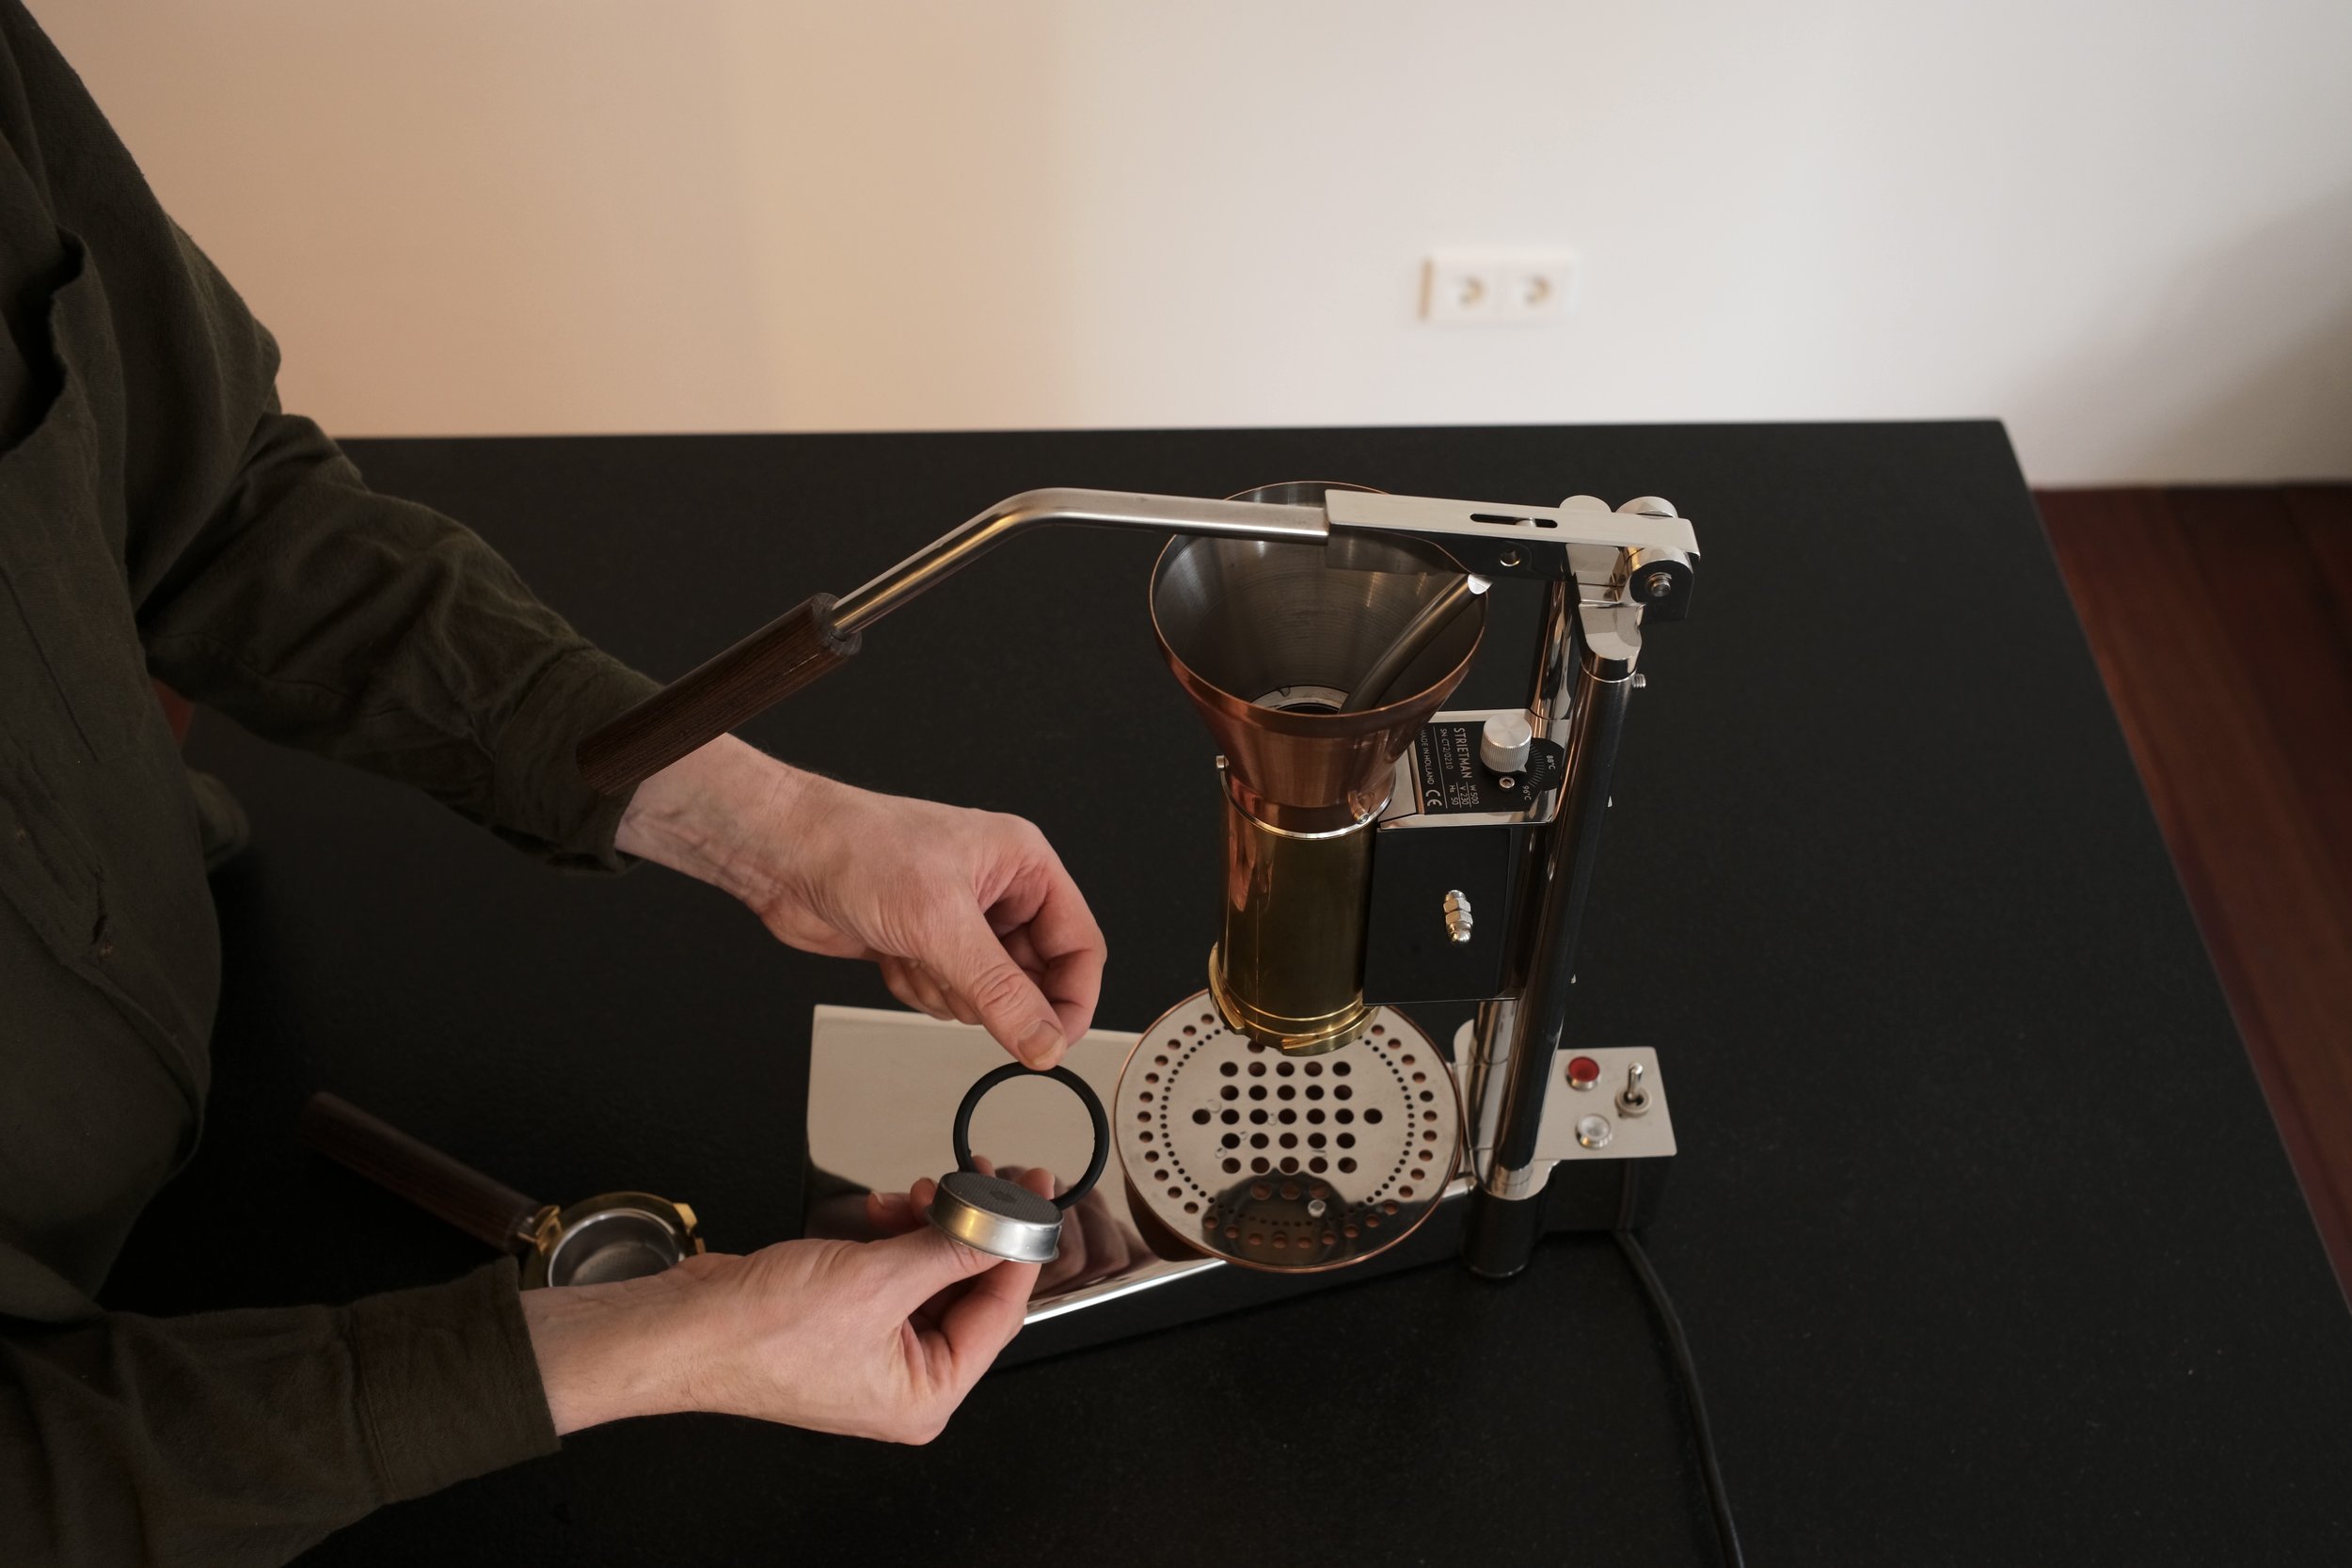
How to remove and clean the shower screen
On the CT2v2:
First drain the boiler.

1. Unfasten the quick-connect wheel at the pivot point and disconnect the piston arm.
2. Let the piston arm rest on the horizontal groove. Press the piston arm down with the lever handle. Because it is not connected at the pivot point it can be pressed past its lowest point.

3. Keep your hand under the brew group to prevent the shower screen and piston from dropping down.
4. Press down until the shower screen and the grouphead seal pop out.

5. Reconnect the piston at the pivot point with the quick-connect wheel.
6. You can now clean and inspect the group head seal and shower screen.
On the CT2v1:
1. Insert a small flat head screwdriver under the rim of the shower screen and begin to carefully prise it out.
2. Do not apply too much pressure at any one point, as this may cause the screen to bend. Instead, steadily work the screwdriver around the edge of the screen until it pops out.
3. Clean the shower screen with hot water and soap and wipe the bottom of the brew group with a paper towel.
4. Place the screen over the group and apply even pressure to snap it back in place.

How to clean the outside
To remove coffee stains and other residue from the outside surfaces of the CT2, wipe gently with a damp cloth or towel.
Do not use liquid or spray detergents on the outside of the machine as they will affect the CT2’s finish.

Care
Water quality
To ensure the longevity of your machine we encourage you to use filtered water. The quality of water depends on its source.
We recommend using water that has a carbonate hardness (or alkalinity) between 40-80 ppm and a general hardness of 60-180 ppm (preferably calcium and magnesium Ca2+ / Mg2+ ), with Chloride (Cl-) of max 30 ppm.
Make sure to filter your water to remove Chlorine (Cl2). There shouldn’t be more than 0.05 ppm. Likewise, Iron (Fe+2 / Fe+3) should be max 0.02 ppm.
How to descale the boiler
Using filtered water with the CT2 will reduce the need for descaling.
1. Prepare a weak acidic solution by mixing a ratio of 5% citric acid to 95% hot water and stirring well. You can also mix the juice of one lemon with 300ml of hot water.
2. Carefully pour the solution into the boiler up to the maximum marker. Be careful not to splash any on the outside, as this will cause staining.
3. Turn the machine on and put the temperature dial on 80°C. Leave the solution until the boiler is clean (maximum 30 minutes). Drain the boiler by lifting the lever arm up.
4. After descaling, thoroughly rinse the boiler with fresh water. Repeat the process if necessary. 5. Remove and clean the piston and lubricate the seals.
How to polish the brass and copper components
You’ll need a dedicated copper and/or brass polish, a clean soft fiberless cloth, and acid-free grease (such as Molykote Multilub) .
Do not use liquid or spray detergents on the outside of the machine as they will affect the CT2’s finish.

1. Carefully check your cloth for dirt – foreign particles can scratch the brass and copper finishes.
2. Check for dirt on the machine surface, and carefully wipe any particles off with a paper towel.
3. Work the polish into the brass and copper surfaces with a circular motion.
4. Some marks might take more effort to polish out. Be careful when applying pressure, as this can scratch the surfaces instead.
5. Wipe off the excess polish with a clean soft cloth and buff to a high shine.
6. Apply a thin coat of acid-free grease (molykote multilub) to protect the surface from staining.

Note: be careful of water splashes and fingerprints on the outside of the group. The acids in finger oils and dried up water can react with the metals to form stains, to prevent this we recommend to lubricated the outside of the group with Molykote Multilub after polishing.
How to lubricate the seals
General note on lubrication:
All seals can be lightly lubricated with food-grade silicone grease. A faint shine is sufficient. Reapply every few months depending on use.
You’ll need a food-approved silicone grease (such as Molykote 111 Compound). Always re-lubricate the piston seals after cleaning or replacement.
1. Wipe the seals dry and remove any dirt with a paper towel or with hot water and soap.
2. Apply a small drop of grease to the seal and spread it with your fingers until the seal is evenly covered
3. You only need a tiny bit of grease – a faint shine means the seal is thoroughly coated.
4. The white piston seal should be lubricated on the sides. Be careful when applying grease to the areas at the top and bottom of the seals as excess grease can collect here.
Which lubricants to use and when
The following products are recommended for use with Strietman machines and are included in the service kits.
Molykote 111 compound silicone grease – used to lubricate the seals. This is a clear colourless grease, FDA approved food safe.
Molykote Multilub – used to maintain the brass brew group, the copper dome, and to lubricate the portafilter bajonet teeth and the axle that secures the piston arm. This is a yellow grease.
Replacing
How to replace the outer piston seals
You’ll need a small flathead screwdriver (use a blunt one to avoid scratching the new seals).
1. First remove the piston from the machine. If there is a lot of limescale buildup, you may need to descale your machine before the piston can be removed.
2. Work the screwdriver under the old seal at the bottom of the piston. Twist the screwdriver to prise the seal out of its groove. Once you’ve worked it a little bit out, you can slide the screwdriver around the piston to pull the remainder of the seal free.
3. Remove the upper black seal by working the screwdriver between the sides and flipping it out.
Clean the piston with hot water and soap and dry it before putting the new seals into position. If there is a lot of limescale buildup, you may need to descale the piston before it can be put back in place.
4. Lubricate the seals with a little silicone grease (Molykote 111 compound). You only need a tiny bit of grease – a faint shine means the seal is thoroughly coated. Hold part of the black seal in its groove and push it into place around the piston.
5. Stretching the white seal slightly will make it easier to position, the black ring inside the white seal should be placed facing down.

To make it more pliable you can immerse the white seal in boiling water for a minute. Place one part into the piston groove and stretch it around until it snaps into place. It might twist a little near the end but you can correct it with your fingernails or with careful use of the small flathead screwdriver.

How to replace the piston center seal
You’ll need a ring plier and a small flathead screwdriver (use a blunt one to avoid scratching the new seals).
1. First remove the piston from the machine.
2. Remove the housing clip with the ring plier and pull the piston arm out of the piston housing.

3. There is a central seal at the bottom of the piston. Insert the screwdriver through the side of the piston to grip the seal and flip it out.

4. Clean the piston with hot water and soap and dry it before putting the new seal into position.
5. Lubricate the seal with a little silicone grease (Molykote 111 compound).
6. Place the centre seal straight inside the piston and push one side into place. Once it has some purchase you can push it in entirely.
9. Put the piston back in the piston housing and lock it in place with the housing clip.
How to replace the grouphead seal
You’ll need a small flathead screwdriver (use a blunt one to avoid scratching the new seals).
1. For easy acces first remove the shower screen.
2. Work the screwdriver under the old seal at the bottom of the brewgroup. Twist the screwdriver to prise the seal out of its groove.
3. Once you’ve worked it a little bit out, you can slide the screwdriver around the seal to pull the remainder free.

4. Lubricate the new seal with a little silicone grease (Molykote 111 compound).
5. Hold the seal in its groove and push it into place.
Inserting the filterholder without the basket is an easy way to push the seal further into the groove.

How to replace the dome seal
You’ll need a hexagonal key size 2.5 and a small flathead screwdriver (use a blunt one to avoid scratching the new seals).
One careful note: be sure not to overly tighten the 3 hex screws on the dome. This can cause the dome seal to leak. Tightening very lightly is sufficient.
1. Remove the piston from the machine.
2. Make sure that the inside of the boiler is completely dry.
3. Remove the 3 hexagonal bolts.
4. Remove the dome by pushing it upwards. Gently wiggle and turn it to loosen.
5. To remove the dome seal carefully work the small flathead screwdriver under the old seal to prise it out of its groove.
After the dome has been removed, we recommend replacing the dome seal with a new one. The old seal will likely be damaged. This new seal needs a very light grease (a minimum amount of Molykote 111 Compound).

For models with serial number 0100 onwards, the stainless steel group ring has 3 additional set screws that keep it fixed in place.